Shavuot, the holiday where we eat lots of yummy dairy dishes is just around the corner. And although I love all the dairy food served at a Shavuot table, my favorite part is being able to have a slice (or two) of cheesecake for dessert. And like many other food bloggers, I love taking this opportunity to create new cheesecake recipes.
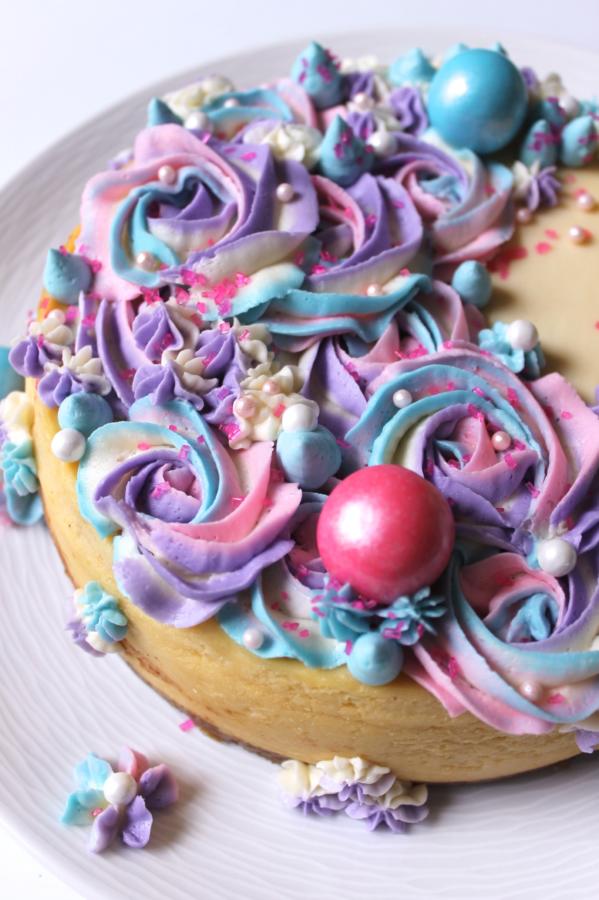
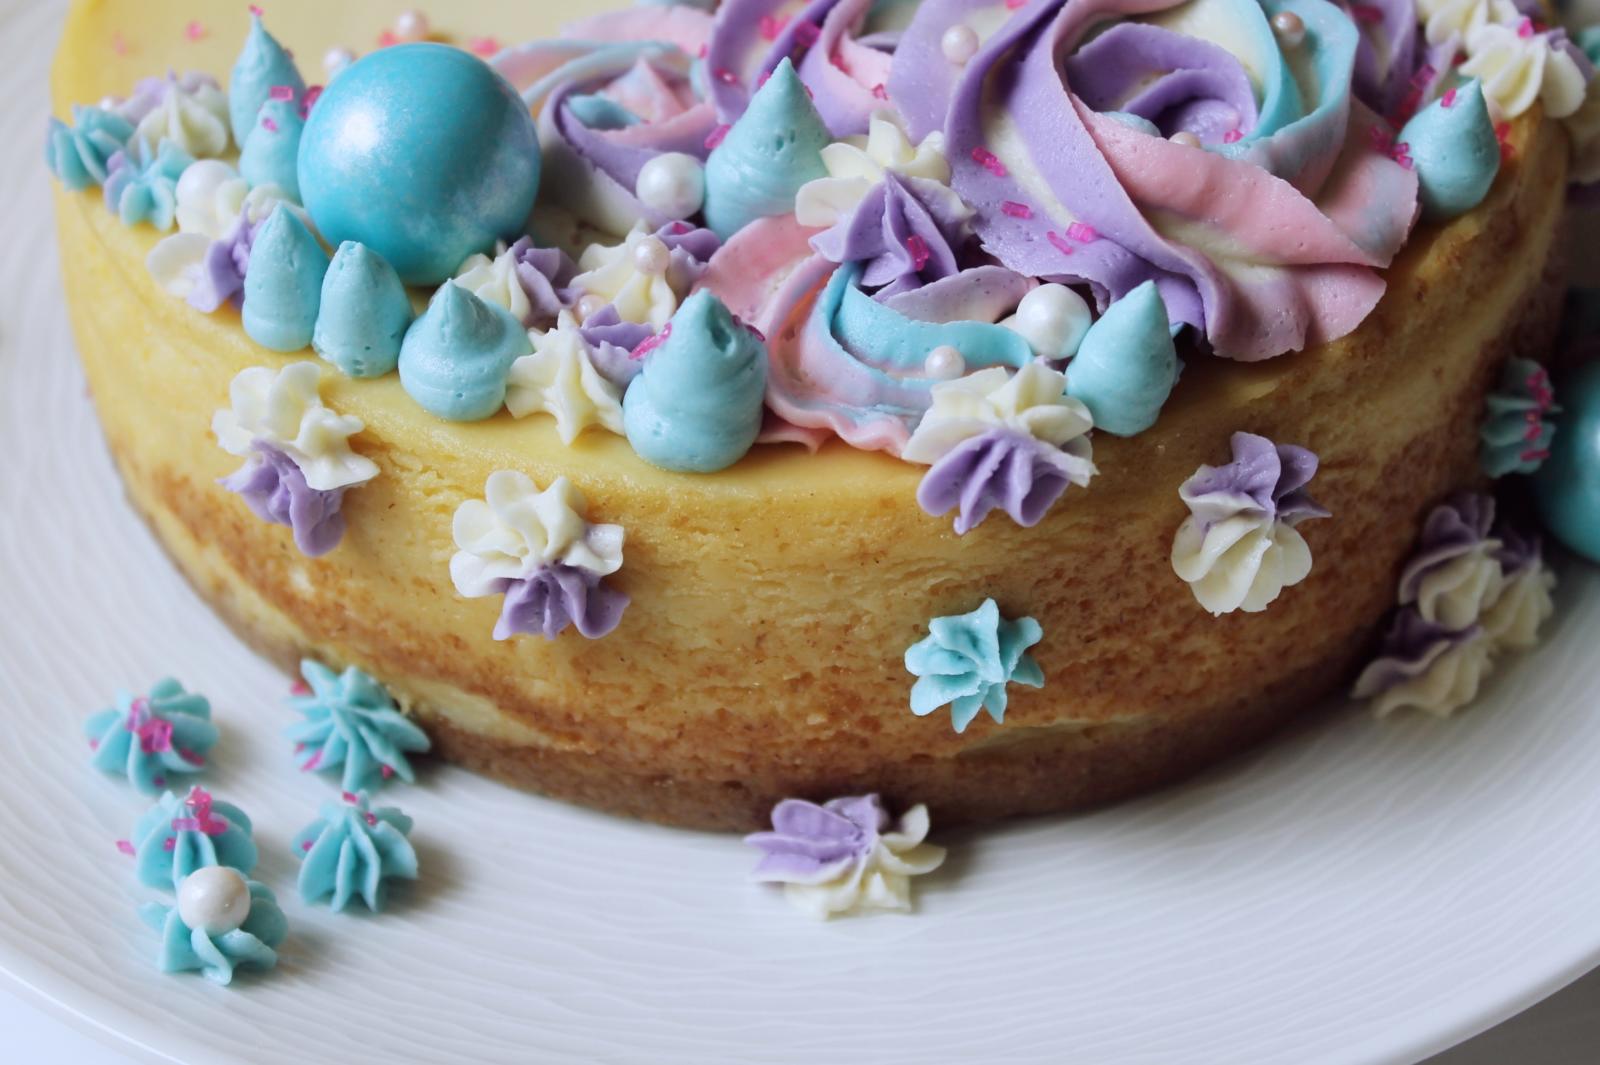
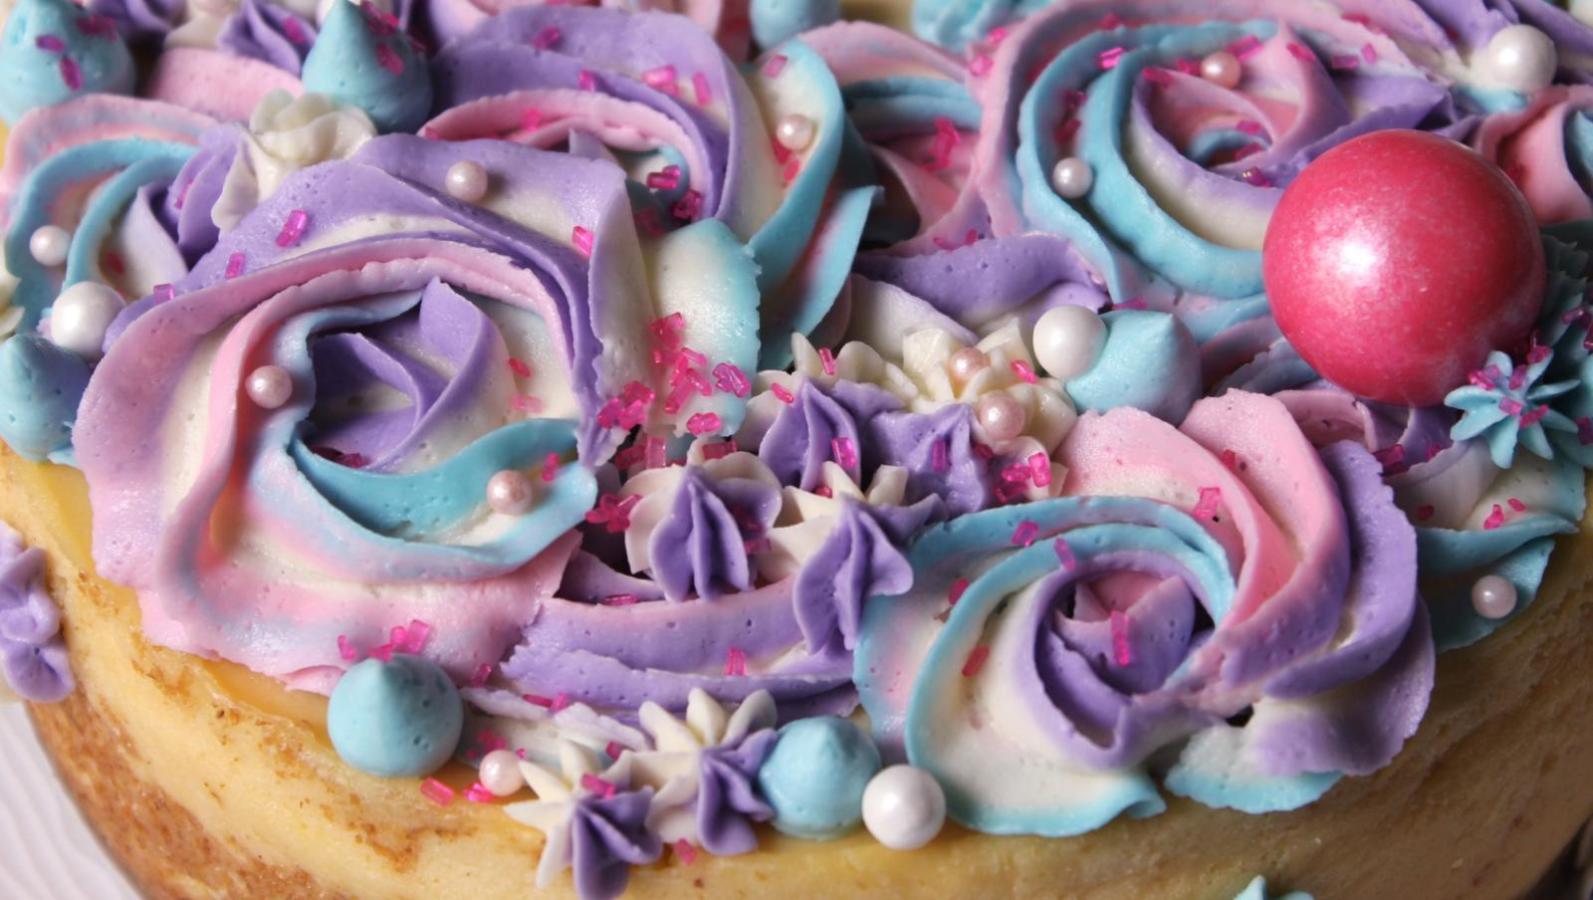
Speaking of new cheesecake recipes, with the unicorn craze still happening, we created a unicorn cheesecake!
There really are no rules to making anything unicorn. Everything colorful, sparkly, and exploding with happiness can be labeled “unicorn”.
That’s the thing about unicorn food that I love, it’s so simple to achieve and most importantly, it’s super fun and cheery.
The Nosher celebrates the traditions and recipes that have brought Jews together for centuries. Donate today to keep The Nosher's stories and recipes accessible to all.
You can dye the cheesecake filling different colors before baking and flavor the buttercream with different extracts like cotton candy or bubblegum.
Ingredients
For the Cheesecake Filling
- 3 8-oz packs of cream cheese, not whipped, room temperature. (I use Philadelphia cream cheese)
- 1¼ cups granulated sugar
- 8 oz sour cream, room temperature
- 2 Tbsp all-purpose flour
- 2 tsp pure vanilla extract
- 3 large eggs, room temperature
For the Crust:
- 1½ cups graham cracker crumbs
- 5 Tbsp unsalted butter, melted
- ½ cup granulated sugar
- ¼ tsp kosher salt
For the Buttercream
- 3 sticks unsalted butter, room temperature
- 4 cups confectionary sugar
- 1 tsp pure vanilla extract
For the Decorations:
- Piping bag and tips/Ziploc bag and scissors
- Food coloring gel
- Plastic wrap (optional, for multiple toned appearance)
- Sprinkles/edible pearls
- Gumballs
Directions
Cheesecake
- Preheat the oven to 350 degrees F. Spray a springform pan with cooking spray. Set aside.
- In the bowl of a stand mixer fitted with the paddle attachment, beat the cream cheese on medium speed until smooth, about 3 minutes. Add the sugar and mix well.
- Add the sour cream, flour and vanilla until well combined.
- Turn the speed down to low and add the eggs, one at a time, mixing until just combined. Do not over mix.
- In a separate bowl, mix the graham cracker crumbs, butter, sugar and salt. Press into the bottom of the prepared spring-form pan.
- Pour the cheesecake batter into the prepared crust and bake for 45-55 minutes. The cheesecake should be pale in color and still slightly wobbly in the center. It will continue to cook as it cools and will become more firm after refrigerating it.
- Turn off the oven and leave the cheesecake inside for 1 hour. After one hour, allow the cheesecake to come to room temperature before refrigerating. I recommend refrigerating the cheesecake for at least 3 hours and preferably overnight before releasing it from the pan.
Buttercream Frosting
- Place the butter in the bowl of an electric mixer. Beat on medium-high speed until light and fluffy, about 2 minutes.
- Turn off the mixer, add 1 cup of sugar and mix well. Continue this process of adding 1 cup of sugar at a time and mixing well after each addition until all the sugar is used, scraping down the sides of the bowl as needed. Add the vanilla and mix until smooth and fluffy.
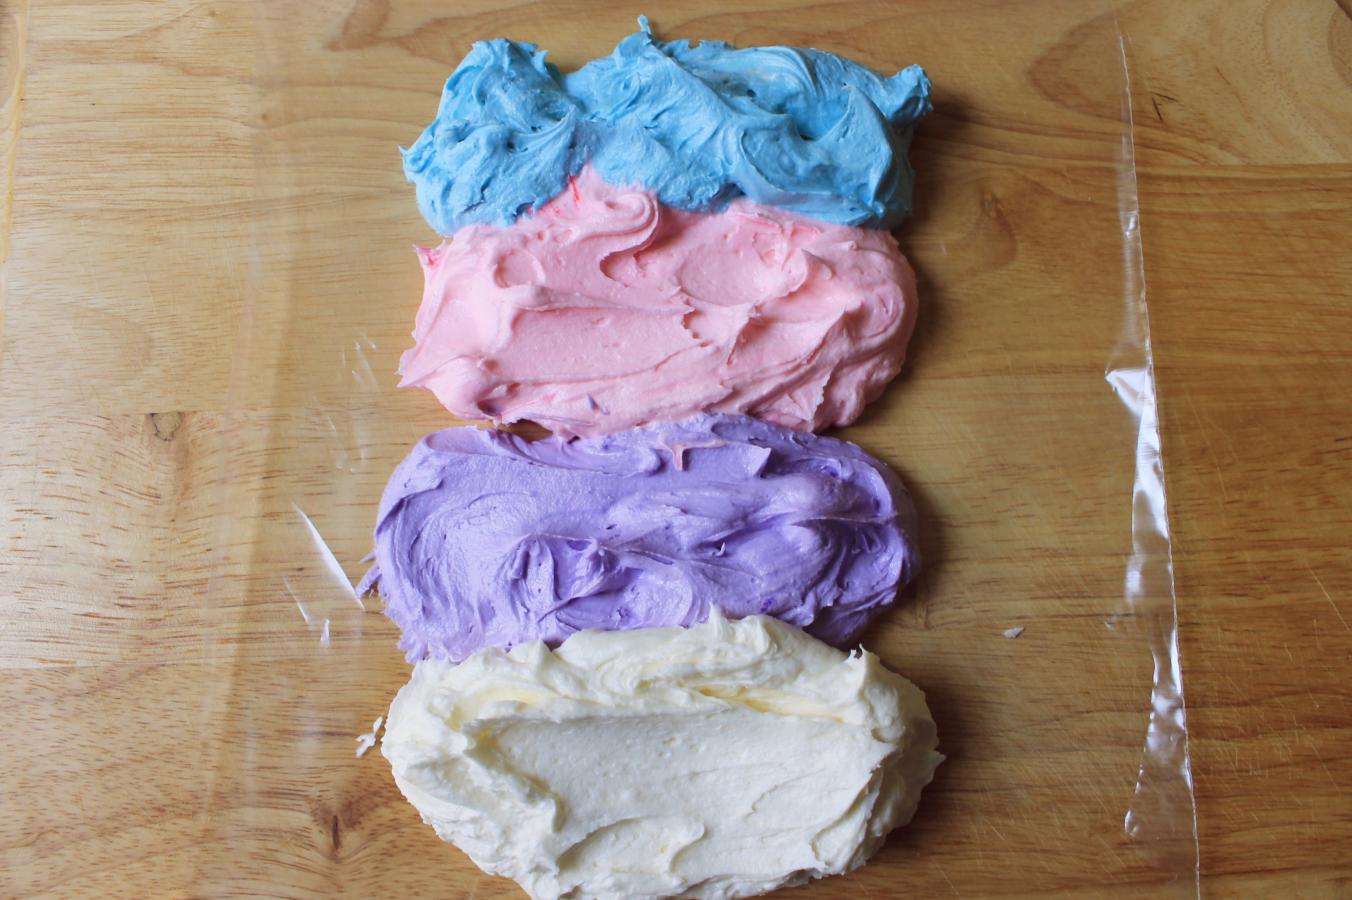
- Separate the buttercream into a few bowls (depending on how many colors you would like to use) and color each with food gel. I recommend using food gel as liquid food coloring can alter the consistency.
Make Frosting Roses
You can make buttercream frosting roses with either a Ziploc bag or piping bags. Instructions are below.
If Using a Ziploc Bag:
Fill a large Ziploc bag with buttercream, press the buttercream towards the bottom of the bag and twist the top closed (so no buttercream flows out). Cut one of the corners as small as you can or as large as 1/4" to create your frosting tip of your desired size, then just swirl the buttercream.
If Using a Piping Bag:
If you have a piping bag and piping nozzles, here are videos that show how to make different shaped roses: classic rose, swirled rose, two-toned buttercream rose.
Multiple Toned Roses:
I added a few colors to my piping bag to create a multiple toned appearance, which made it look extra special.
- Lay out plastic wrap and place your desired buttercream colors on it, side by side.
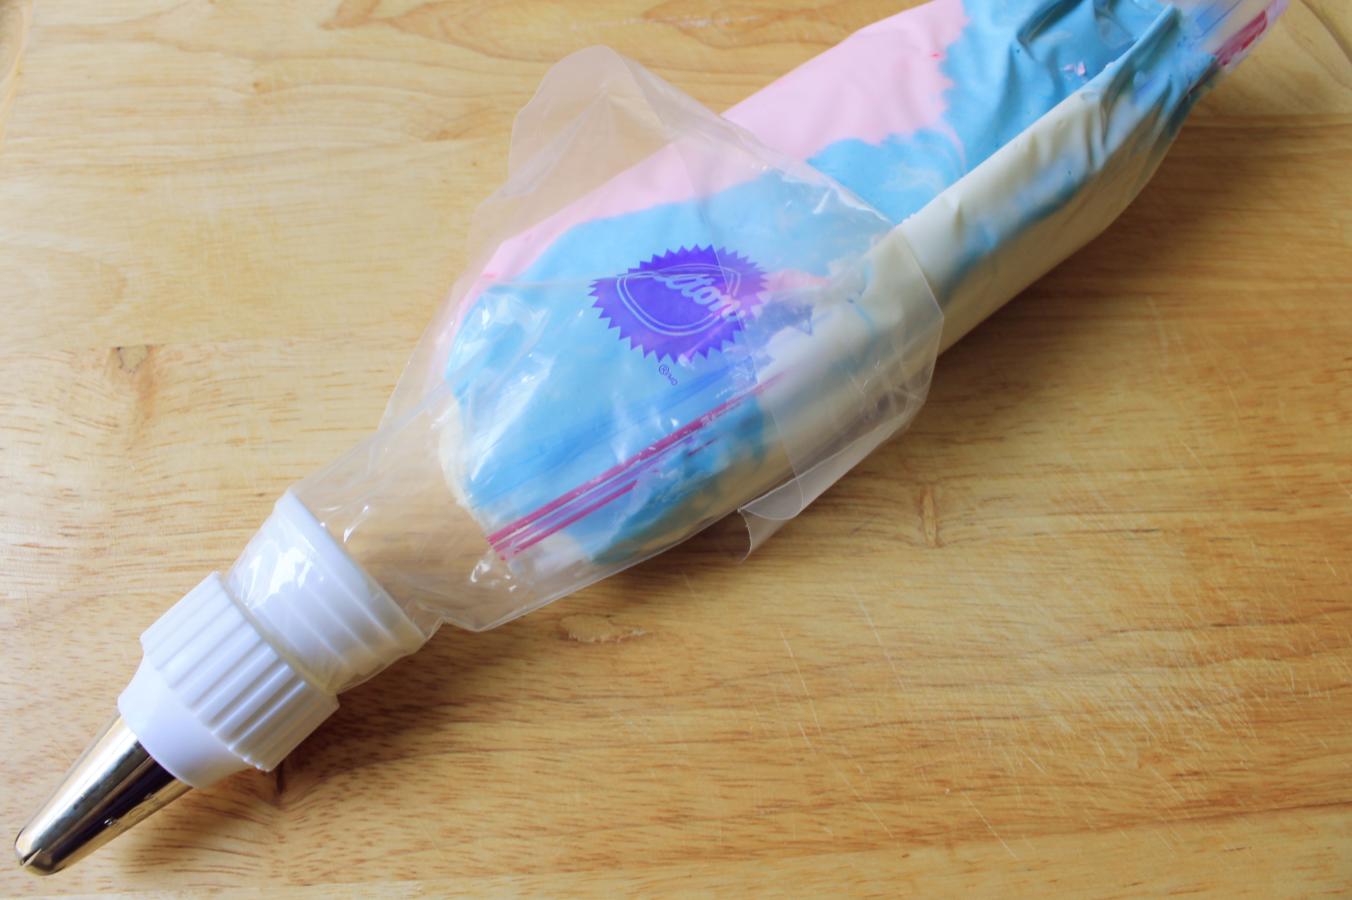
- Roll the plastic wrap up and twist one end (so buttercream doesn’t flow out).
- Squeeze the buttercream into a large piping bag fitted with a tip, or into a Ziploc bag, if using. That’s it!
Next, add sprinkles
- Add lots of sprinkles, edible pearls and giant gumballs to finish off the look.
- Serve and enjoy!
