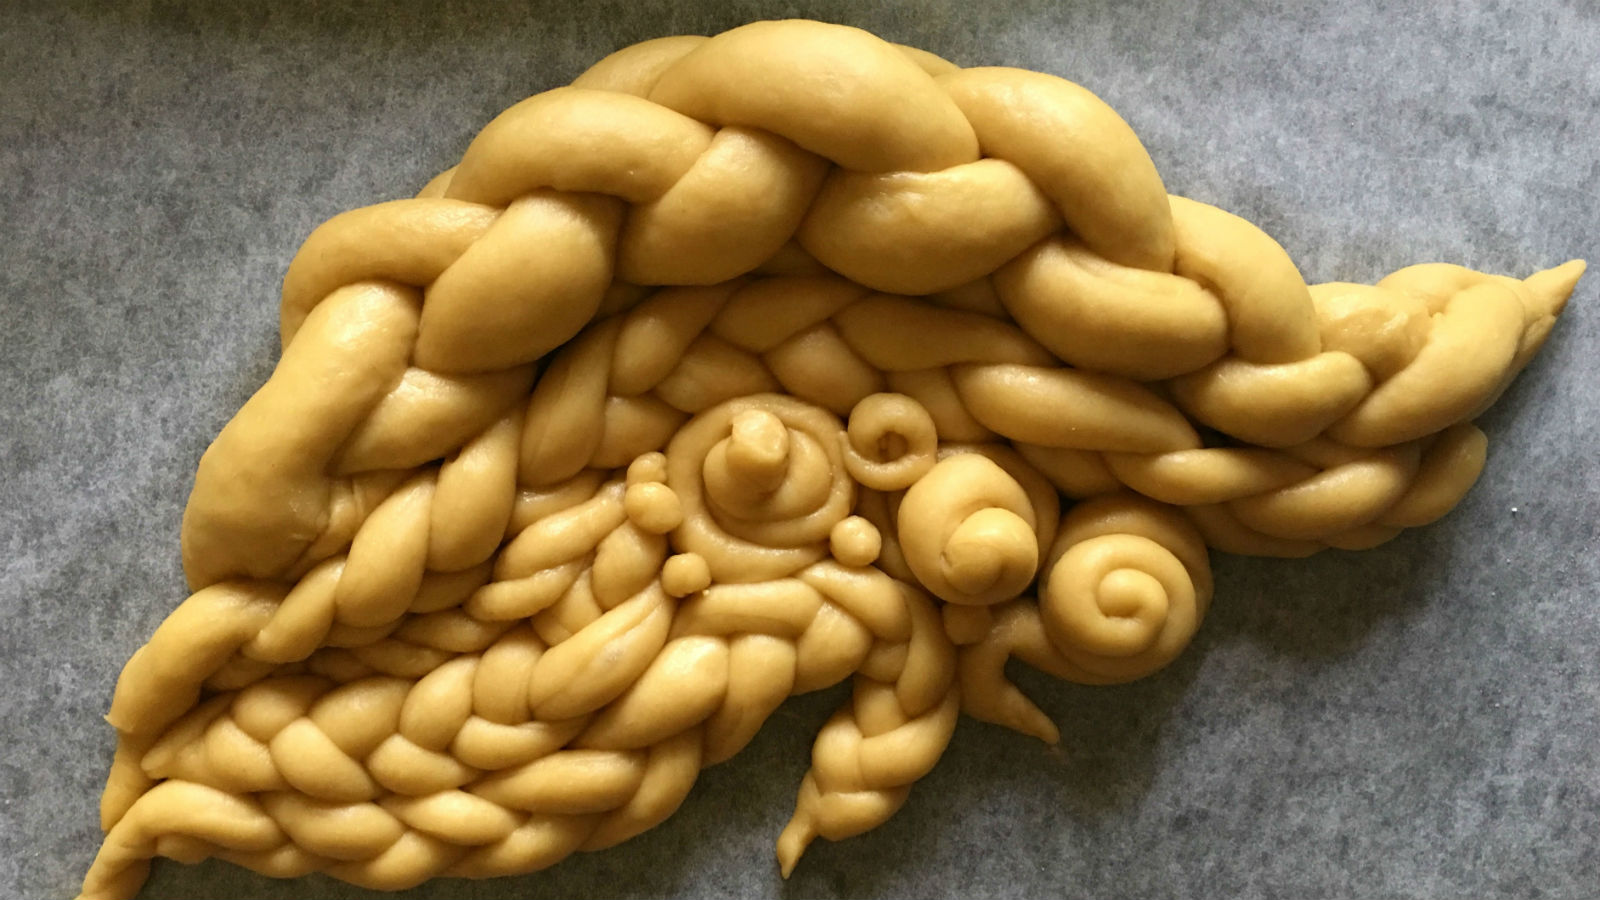
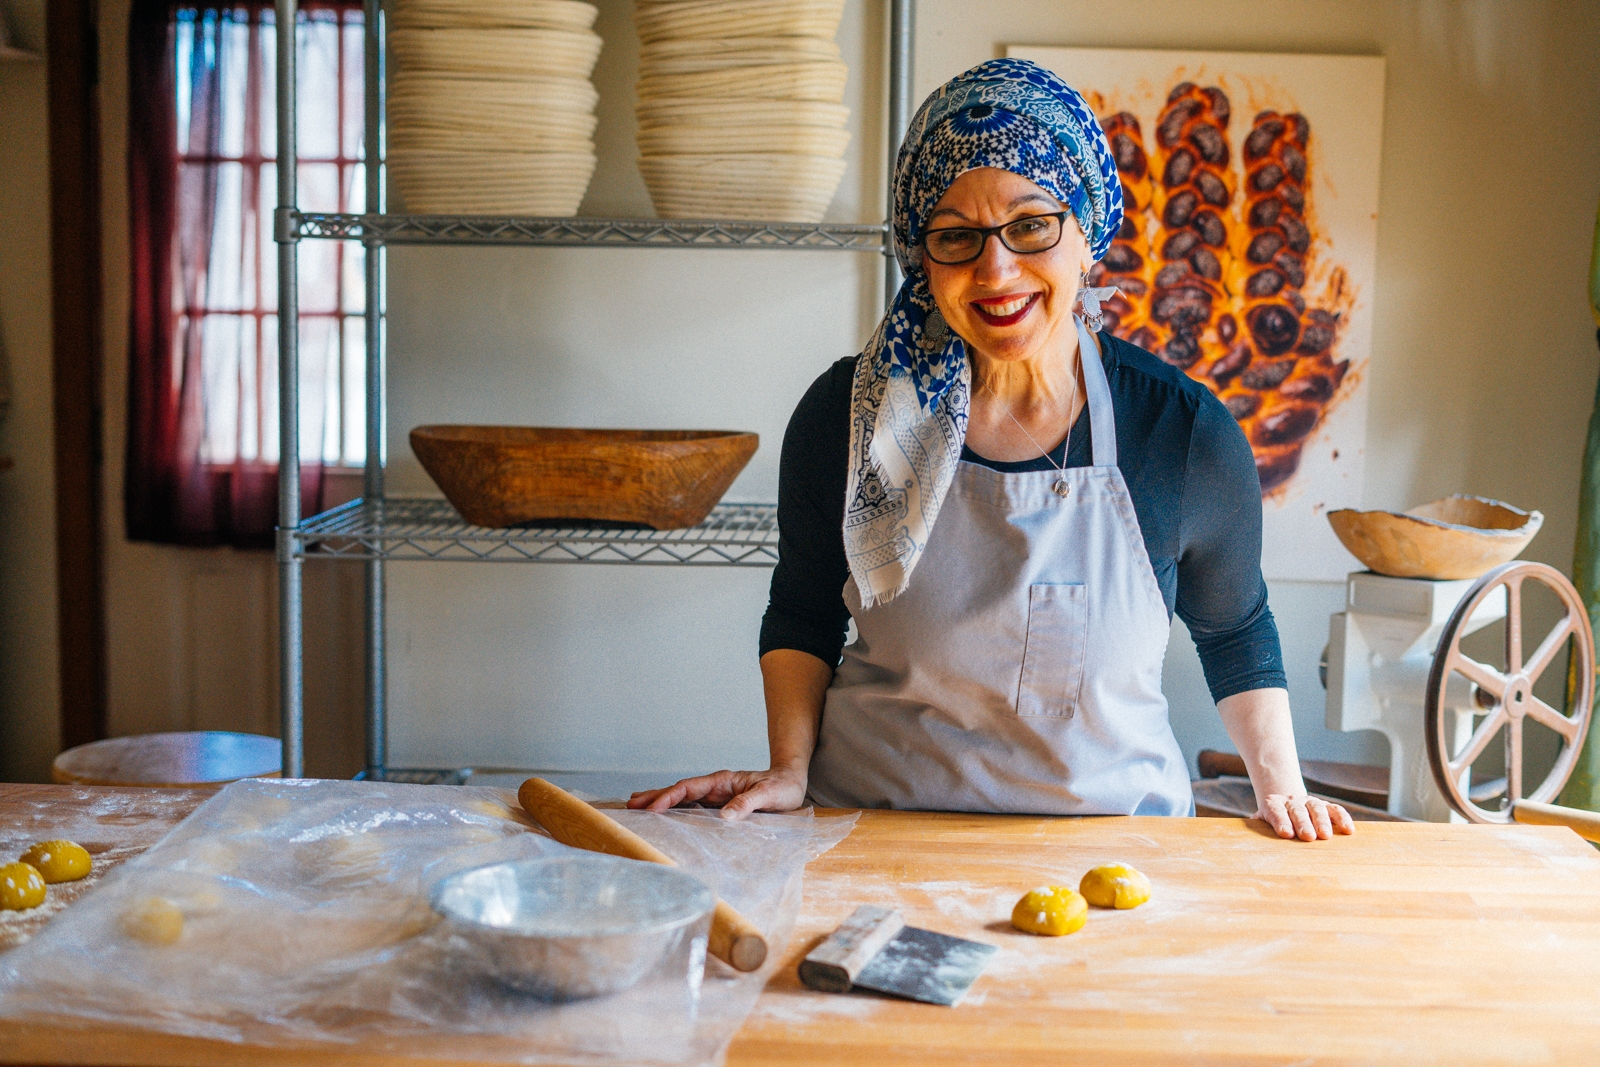
Cheryl Holbert is an accomplished bread baker, but it’s her challah shaping that will stop you in your tracks. With dough as her medium, Holbert creates all manner of fancifully shaped challahs that are edible works of art. Make one in her style, and your first inclination might just be to shellac it and hang it on your wall. Really, her breads are that beautiful.
Tiptree World Bread Awards, the UK’s leading competition that celebrates the art of bread making, was held last year in the United States for the first time. Holbert was given the Tiptree Showstopper Award for her Earl Grey rose challah, a sabbath bread flavored with rosewater and earl grey tea and shaped like an English rose.
Cheryl spoke with The Nosher from her home bakery, NOMAD, in Derry, New Hampshire to share some of her challah-shaping secrets:
The Nosher celebrates the traditions and recipes that have brought Jews together for centuries. Donate today to keep The Nosher's stories and recipes accessible to all.
1. Sketching
When designing an unusually shaped challah, sketch it out first. Determine its size and how you want it to look. Do you want a round challah? Find ways to turn the simple round challah into one that is both bread and art. “Your sketch should divide the bread into sections,” says Holbert, “filled with two, three, or four strand braids and smaller single strands for embellishment.” Use the sketch as reference when you are rolling out the ropes for your braids. Over time, you will have a sketch book filled with the different designs you have created for your various challah.
2. Scaling/Weighing
Once the dough has been made and has risen, you are ready to begin shaping your challah. If you are making braids out of the challah dough, weigh each lump of dough so that each strand in a braid is the same size. Once you have weighed out the lumps, shape each one into a ball. Allow the round piece of dough to rest for 30 minutes before moving on to the next step.
3. Sheeting
Start with the first round lump of dough and use a rolling pin to roll it into a thin, flat sheet. Tightly roll up the thin sheet into a rope, which then becomes one of the strands in your braid. Once the tight ropes have rested for between 5-10 minutes, roll each one out by hand in consecutive order. To roll, place the inner palms of your hands on the center of the rope and roll on the work surface back and forth, lengthening the strand until the desired length. The resulting strands will be smooth and bubble free. If a bubble does form, press it out with the palm of your hand.

4. Braiding
Thanks to the scaling and sheeting, your braids will be smooth, even, and lovely. Use simple braids to fill a design — one strand or braids made with two, three, or four strands. Braid with a light hand, resisting the urge to make compact, tight plaits, while also leaving a bit of space between the completed braids in the overall pattern. This allows room for the dough to continue rising during the final proof, as well as in the oven while baking. Don’t use complex braids if you are designing artful challah. Keep the braids within the design simple, allowing the overall design to take center stage.
5. Washing and Seeding
Once your design is completed and proofed, beat an egg with ½ teaspoon of water and a pinch of salt. Pass through a strainer for a smooth finish. Brush the egg on the braided dough in the direction of the plaited strands, covering the entire surface.
When applying seeds to your shaped challah, fill two or more small bowls — one with water, the others with the seed(s) of your choice. Rather than sprinkle the seeds on your bread, dip your thumb in the water, then in the seeds, and then press the seed-coated thumb onto the dough. This gives you complete control of the seed application process. You can make designs on the bread out of the differently colored and shaped seeds, like poppy, sesame, pumpkin, nigella, etc.
Check out Cheryl Holbert’s recipe for tahini turmeric challah here.