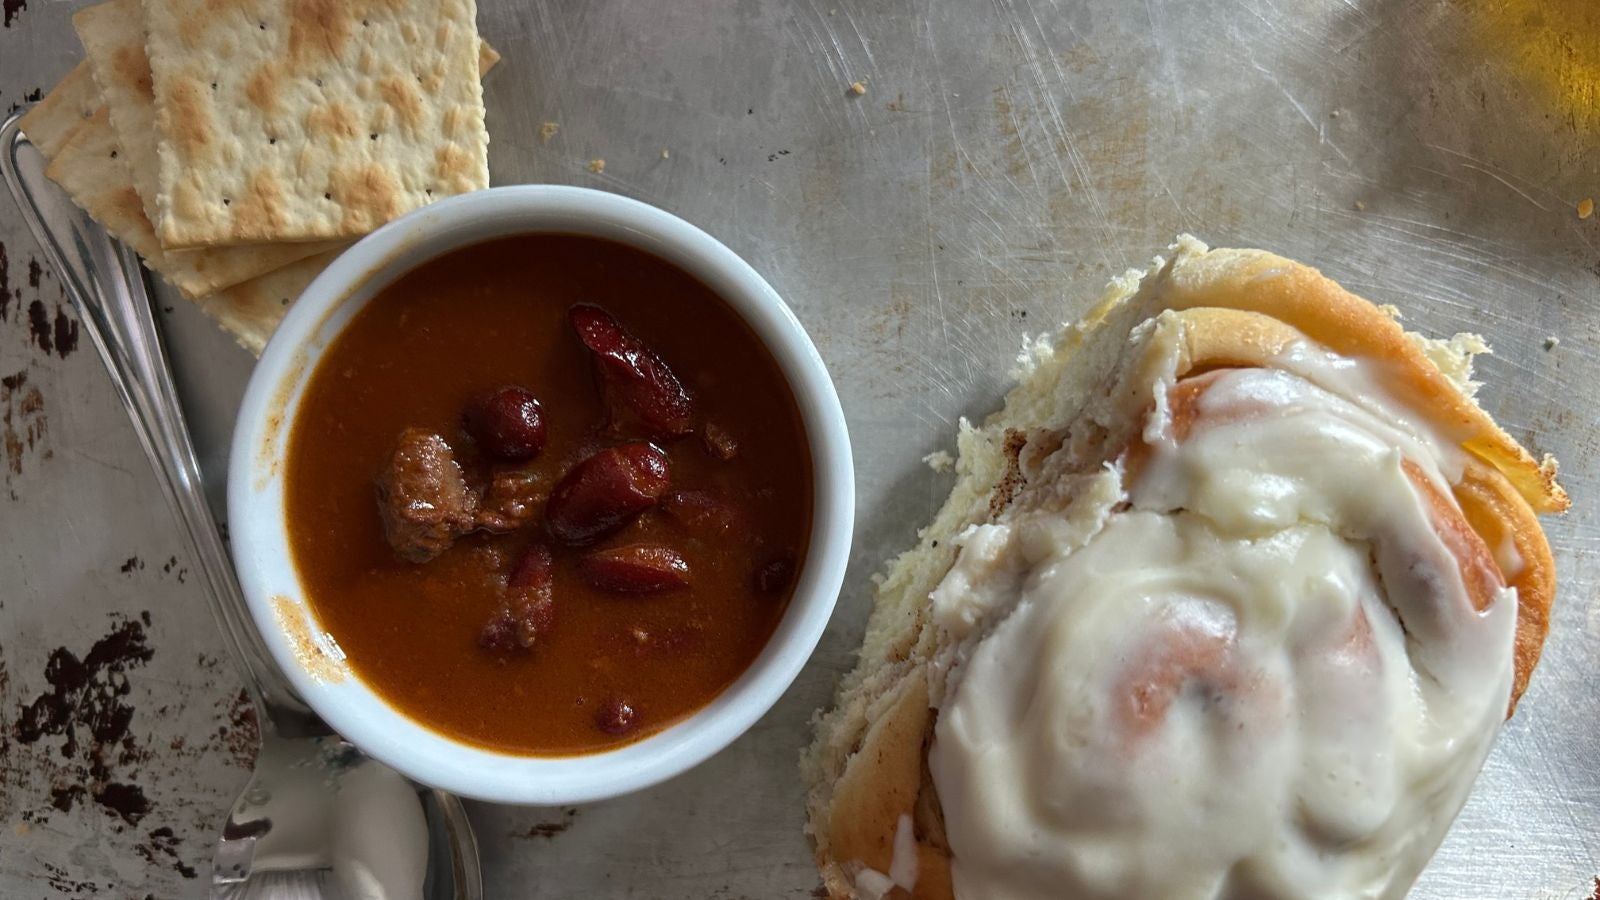
Outsiders look at us like we’re mad for eating chili with frosting. We just shrug. As a Jewish pastry chef in Nebraska (with a county fair ribbon for sticky buns) I don’t question it. Around here, chili and cinnamon rolls are a sacred tradition.
Born from church suppers and school cafeterias, the pairing spread like a Midwest secret handshake. Today it’s a Husker tailgate season classic, a staple on cold nights and our state’s unofficial comfort food (behind runzas, Nebraska’s beef and cabbage-stuffed hot pocket).
For a Jewish family breaking the Yom Kippur fast, it’s perfect. Sure, brisket’s traditional, but nothing says welcome back to the land of the living like a gooey cinnamon roll beside a spicy bowl of chili. Sweet and savory, austere and indulgent, the combination captures the emotional range of the day.
Nebraska’s Jewish community is small but longstanding. So of course, our traditions take on a local flavor. To keep it kosher, the chili is plant-based. Impossible and Beyond meat make it hearty, but lentils are excellent, too. And yes, beans are welcome, Nebraska doesn’t judge (we aren’t Texas). But around here chilli recipes aren’t written, they’re inherited, and there’s probably at least one secret ingredient.
The Nosher celebrates the traditions and recipes that have brought Jews together for centuries. Donate today to keep The Nosher's stories and recipes accessible to all.

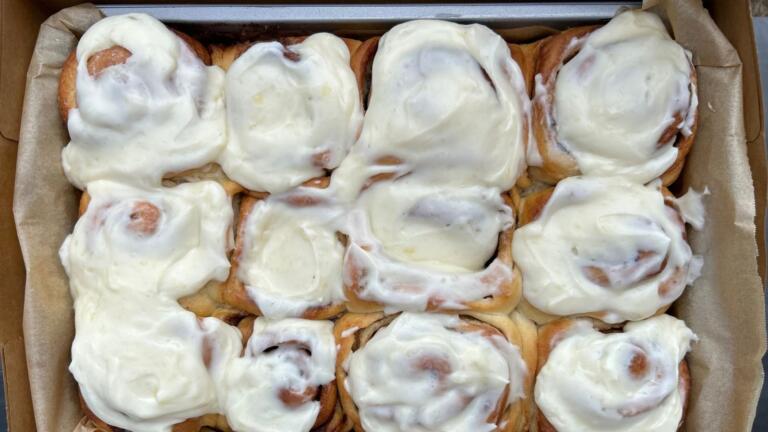
The cinnamon rolls, that’s where I come in. Pure dairy indulgence, soft warm spirals meant to be pulled apart, perfect for dipping or savoring on their own. Each bite tastes like finding home in unexpected places: a Jewish table in Nebraska, chilli paired with cinnamon rolls.
Notes:
- This dough is a two-part brioche. While it may seem like extra work, it’s actually the secret to the softest, richest, pull-apartiest cinnamon rolls you’ll ever have.
- You can refrigerate the prepared rolls for up to two days before baking, or freeze them for up to three months. (See: Step #10.) You’ll just have to take extra time giving them their second proof if they’re coming out of the fridge — it’ll be at least 2 hours-2 hours 30 minutes, which is perhaps enough time for you to attend the Neilah service, make it home and still have time to preheat the oven before they’re proofed.
- These cinnamon rolls are best enjoyed fresh, but if you have leftovers, wrap them tightly: They’ll keep on the counter for up to two days, or in the fridge for four. A quick zap in the microwave or warm oven and they’re just as soft as when you first baked them.
This article was produced as part of The Nosher’s Jewish Food Fellows Program, which aims to diversify the voices telling Jewish food stories in media spaces.
Cinnamon Rolls and Chili
Cinnamon rolls are pure dairy indulgence, soft warm spirals meant to be pulled apart, perfect for dipping or savoring on their own.
- Total Time: 3½ hours
- Yield: 12 big cinnamon rolls
Ingredients
For the base dough:
- ½ cup (115ml) warm water, (about 100–112°F)
- 2 Tbsp (20 g) granulated sugar
- ½ tsp (3 g) yeast
- 1 egg, lightly beaten
- 1⅔ cups (200 g) bread flour
For the enriched dough:
- ⅔ cup (150 ml) warm water
- 3 Tbsp (30 g) granulated sugar
- 2 ¼ tsp (10 g) yeast
- 2 eggs, lightly beaten
- 3 ¾ (450 g) cups bread flour
- ½ Tbsp (9g) kosher salt
- ¾ cup (170 g) cold butter, cubed
For the filling:
- ½ cup butter, melted
- 1 cup brown sugar
- 3 Tbsp ground cinnamon
- 3 Tbsp granulated sugar
For the cream cheese frosting:
- 8 oz (227g) full-fat cream cheese, at room-temperature
- ½ stick (57 g) butter, melted
- 1 cup (120 g) powdered sugar
- ½ tsp kosher salt
- 1 tsp (5 ml) vanilla extract
Instructions
- Make the base dough: In a small bowl or measuring cup, combine the warm water, yeast and sugar until dissolved. Let it bloom for about 5 minutes, until foamy.
- In the bowl of a stand mixer fitted with a dough hook, add the wet ingredients you already combined along with the egg. Now you can add your flour and mix on medium for about 5 minutes. Your goal in this step is to start developing some gluten strands, which you’ll see forming. These gluten strands will give your dough structure before we add all the nice, rich butter. While your base dough is mixing, move right on to the enriched dough. (This is when I like to re-measure into the same measuring cups I already used because I am efficiently lazy about dishes.)
- Make the enriched dough: In a small bowl or measuring cup, combine the warm water, yeast and sugar until dissolved. Let it sit for 5 or so minutes until frothy.
- Once your base dough is mixed, leave it in the mixer and add the sweet, yeasty liquid along with your eggs, flour and salt. Again on medium, let your mixer knead this dough for about 6-8 minutes, long enough that it forms a slightly tacky ball, which pulls away from the side of the mixing bowl, and that is smooth and elastic.
- Next, just when you think your poor mixer can take a break, not quite. It’s time to add the cold cubed butter. Add a few cubes at a time, letting them incorporate into the dough a little before adding more. It might, at one point, feel like this is too much butter. This means you’re on the right path. And if you accidentally toss all the butter cubes in at once like I did one time, it will still work out.
- Once your cold butter cubes are all incorporated into the dough, grease a large bowl with nonstick spray. Move your dough into the greased bowl and cover, letting it proof until it doubles in size. Depending on how warm your kitchen is, that could be 1 hour-1 hour 30 minutes.
- Grease a metal or glass 9×13 baking pan and line it with parchment paper.
- Add the filling: Punch down your dough to get the extra air out. Place the dough on a lightly floured surface and, with a floured rolling pin, roll that dough out to roughly a 16×24 rectangle. It should be about 1 centimeter/½ inch thick.
- Brush the melted butter onto your dough rectangle, then top with an even sprinkling of brown sugar, then a dusting of the cinnamon. Finally, sprinkle on the granulated sugar. I like to do it in this order because then you can pat the cinnamon/sugars into the dough and ensure an even coating all around. (I’ve always struggled with tearing dough when I’ve attempted spreading a mixture on top.)
- Tightly (but not too tightly) roll up the dough to form a 24-inch-long log. With an extra sharp knife, cut 12 even rolls, about 2 inches thick. Arrange rolls in the prepared pan. (This is the point at which you can either freeze or refrigerate your cinnamon rolls for future use; see: Notes.)
- If you’re planning on eating them right away, preheat your oven to 350°F and let them proof again until they’re puffy (45 minutes-1 hour). Bake for 24-28 minutes, until golden brown on top and/or a 203°F internal temperature.
- Make the frosting: In a large bowl (or your stand mixer with the paddle attachment, beat together cream cheese and powdered sugar until smooth and creamy. Slowly add the melted butter, vanilla and a pinch of salt, beating gently on low for about 2 minutes. Scrape down the bowl, then crank the speed to medium-high and beat for another 2 minutes. By now it should be a luxurious, fluffy texture.
- Using a spoon, plop 12 generous dollops of frosting onto your 12 warm rolls. Spread it with the back of the spoon, letting it melt into every crevice, and serve immediately for maximum indulgence. Ideally alongside a bowl of hot chili.
Notes
- This dough is a two-part brioche. While it may seem like extra work, it’s actually the secret to the softest, richest, pull-apartiest cinnamon rolls you’ll ever have.
- You can refrigerate the prepared rolls for up to two days before baking, or freeze them for up to three months. (See: Step #10.) You’ll just have to take extra time giving them their second proof if they’re coming out of the fridge — it’ll be at least 2 hours-2 hours 30 minutes, which is perhaps enough time for you to attend the Neilah service, make it home and still have time to preheat the oven before they’re proofed.
- These cinnamon rolls are best enjoyed fresh, but if you have leftovers, wrap them tightly: They’ll keep on the counter for up to two days, or in the fridge for four. A quick zap in the microwave or warm oven and they’re just as soft as when you first baked them.
- Prep Time: 30 minutes + 1 hour and 30 minutes rise time
- Cook Time: 25 minutes
- Category: Entree
- Method: Baking
- Cuisine: Holiday

Leave a Comment